

Cheesy garlic chicken wraps recipes became our go-to comfort food after my kids kept asking for “something crispy and warm” every afternoon. Armed with just leftover rotisserie chicken, flour tortillas, and determination, I set out to create something special without breaking our tight grocery budget. What started as a desperate attempt to use up ingredients before they went bad turned into our family’s most requested weeknight dinner!
Last Tuesday, I was staring at half a rotisserie chicken from the weekend and wondering what magic I could work with our dwindling pantry supplies. The kids were hungry, my husband would be home in an hour, and frankly, I was tired of the same old chicken-and-rice routine. That’s when I remembered my grandmother’s old trick of turning leftovers into something that feels completely new – just wrap it up and make it crispy!
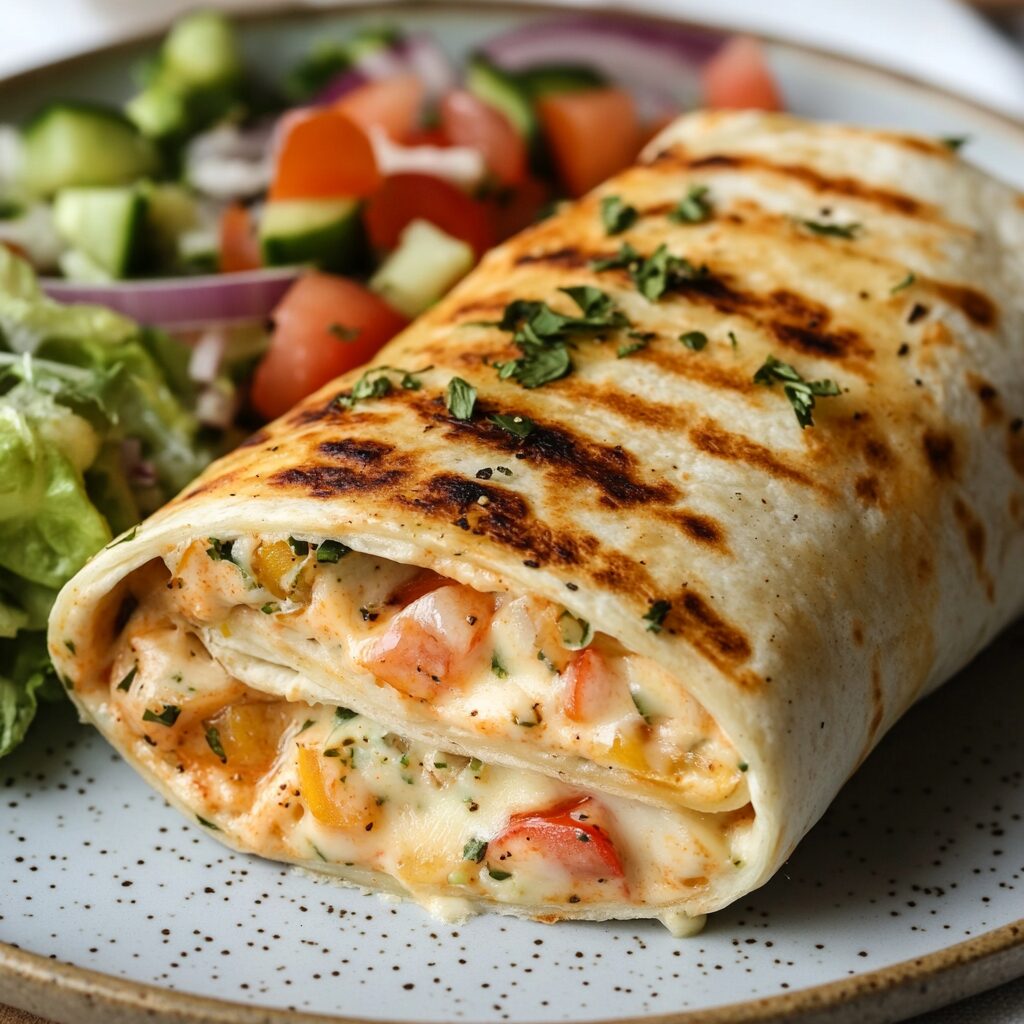
5 Amazing Cheesy Garlic Chicken Wraps
Ingredients
Equipment
Method
- In a medium bowl, combine softened cream cheese, mayonnaise, and minced garlic until smooth.
- Add shredded chicken, half the cheddar cheese, green onion, paprika, salt, and pepper. Mix well.
- Place 1/2 cup filling in center of each tortilla, sprinkle with remaining cheese, then roll tightly.
- Heat butter in large skillet over medium heat. Cook wraps seam-side down for 2-3 minutes until golden.
- Flip carefully and cook another 2-3 minutes until both sides are crispy and golden.
- Let rest 2 minutes before cutting diagonally and serving.
Nutrition
Notes
Make sure cream cheese is fully softened for smooth mixing
Store leftovers in refrigerator for up to 3 days
Can be reheated in a dry skillet to maintain crispiness
Tried this recipe?
Let us know how it was!Table of Contents
What You’ll Need
Ingredients (Total cost: approximately $9.85 for 4 wraps):
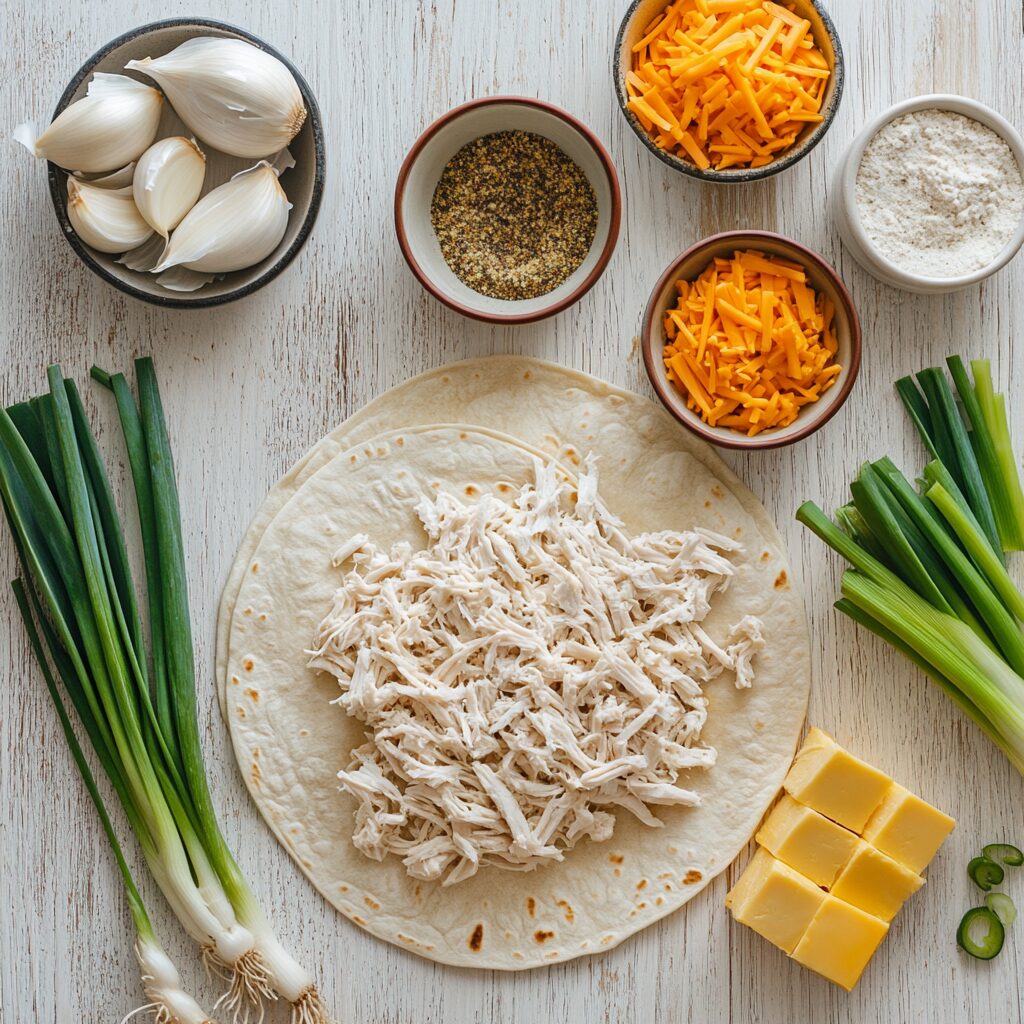
- 2 cups cooked chicken, shredded ($3.50 – using rotisserie chicken)
- 4 large flour tortillas ($1.25)
- 1 cup shredded cheddar cheese ($1.80)
- 1/2 cup cream cheese, softened ($1.00)
- 3 cloves garlic, minced ($0.30)
- 1/4 cup mayonnaise ($0.50)
- 1 green onion, chopped ($0.25)
- 1/2 teaspoon paprika ($0.10)
- Salt and pepper to taste ($0.15)
- 2 tablespoons butter for cooking ($0.50)
Equipment:
- Large skillet or griddle
- Mixing bowls
- Measuring cups and spoons
- Spatula
Step-by-Step Instructions
Prepare the Creamy Garlic Filling

In a medium bowl, combine the softened cream cheese, mayonnaise, and minced garlic. Mix until smooth and creamy. This becomes your flavor base that makes these wraps absolutely irresistible.
Mix the Chicken Filling
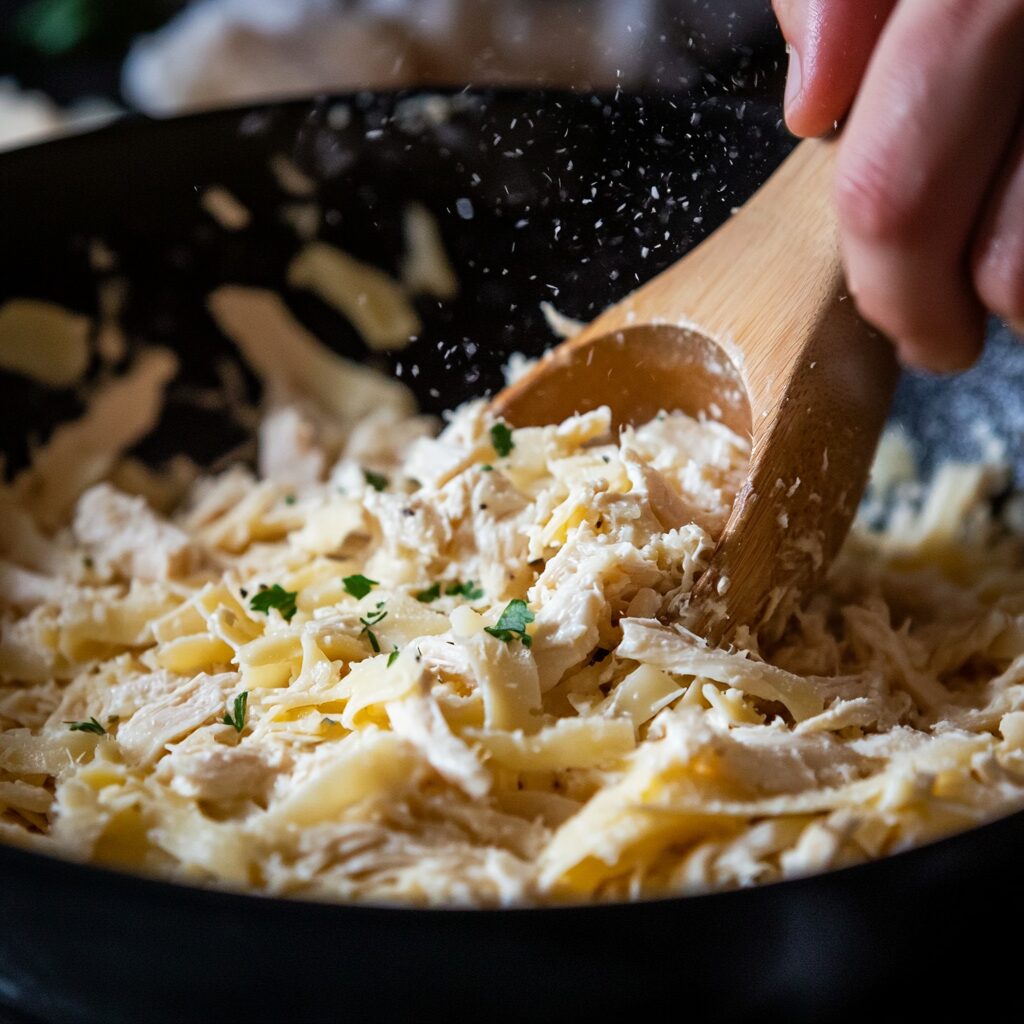
Add the shredded chicken, half of the cheddar cheese, chopped green onion, paprika, salt, and pepper to your creamy garlic mixture. Stir everything together until the chicken is well-coated with that gorgeous, garlicky goodness.
Assemble Your Wraps
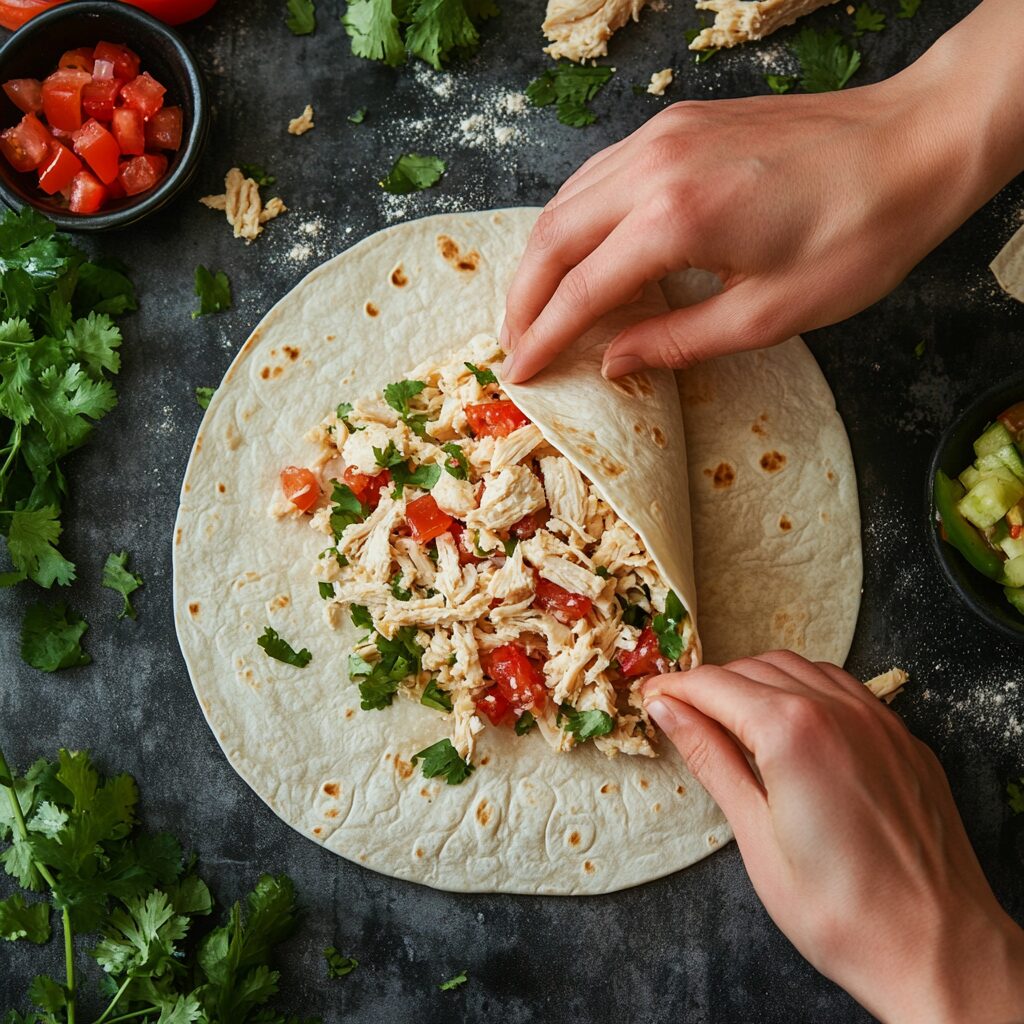
Place about 1/2 cup of the chicken mixture in the center of each tortilla. Sprinkle the remaining cheese on top, then fold in the sides and roll tightly from bottom to top. The key here is to roll them snugly so they hold together when cooking.
Get That Golden Crispy Exterior
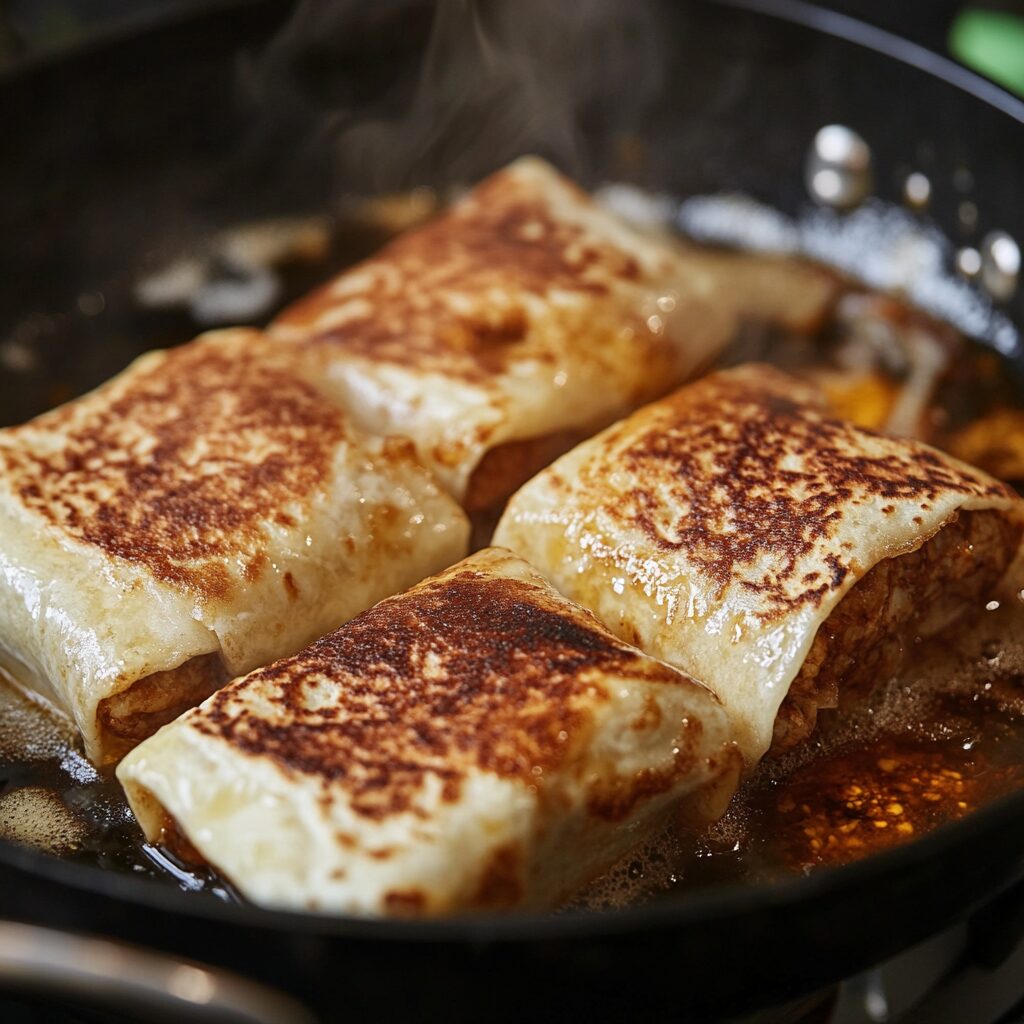
Heat butter in a large skillet over medium heat. Place the wraps seam-side down first and cook for 2-3 minutes until golden brown and crispy. Carefully flip and cook another 2-3 minutes until both sides are beautifully golden.
Rest and Serve
Let the wraps rest for 2 minutes before cutting – this helps the cheese set up and prevents everything from spilling out when you slice them. Cut diagonally and serve immediately while they’re still warm and melty inside.
Why This Recipe Works So Well
The combination of cream cheese and mayonnaise creates an incredibly creamy base that keeps the chicken moist while adding richness. The garlic infuses every bite with that amazing savory flavor we all crave, while the double layer of cheese – mixed in and sprinkled on top – ensures every bite has that perfect cheese pull.
Using rotisserie chicken is my secret to making this recipe both budget-friendly and time-efficient. You’re essentially getting restaurant-quality flavor with pantry ingredients and leftover chicken. The crispy exterior contrasts beautifully with the creamy, cheesy interior, making these feel like a special treat rather than just another weeknight dinner.
Make It Your Own
Buffalo Style: Add 2 tablespoons of buffalo sauce to the cream cheese mixture and serve with celery sticks and ranch dressing for dipping.
Mexican Fiesta: Replace the paprika with cumin and chili powder, add diced jalapeños, and use pepper jack cheese instead of cheddar.
Herb Garden: Mix in fresh herbs like parsley, dill, or chives to the cream cheese base for a fresh, garden-inspired flavor.
Bacon Lover’s: Crumble 3-4 strips of cooked bacon into the chicken mixture for extra richness and smoky flavor.
What to Serve With
These cheesy garlic chicken wraps pair beautifully with a simple side salad dressed with vinaigrette, or try them with our vegetarian taco skillet for a Mexican-inspired dinner spread. For something lighter, serve alongside fresh fruit or pickled vegetables. A warm bowl of tomato soup also makes these feel like the ultimate comfort meal.
Money-Saving Tips
Buy rotisserie chickens on sale: Many grocery stores mark down rotisserie chickens in the evening – stock up and freeze the meat in meal-sized portions.
Make your own garlic powder: If fresh garlic is expensive, substitute with 1 teaspoon of garlic powder – it’s often more budget-friendly and lasts longer.
Use whatever cheese you have: While cheddar is delicious, these work great with mozzarella, Mexican blend, or even cream cheese if you’re really stretching the budget.
Double the recipe: Make extra filling and freeze it in portions. Just thaw, assemble in fresh tortillas, and cook whenever you need a quick meal.
Save the tortilla scraps: Any leftover tortillas can be cut into triangles, brushed with butter, and baked into homemade chips.
From My Family to Yours
These cheesy garlic chicken wraps recipes have become such a lifesaver in our household. There’s something magical about taking simple, affordable ingredients and transforming them into something that makes everyone around the dinner table smile. My kids now request these at least twice a week, and honestly, I’m happy to oblige because they’re so easy and budget-friendly.
The best part? You probably have most of these ingredients sitting in your kitchen right now. That’s the kind of cooking I love – resourceful, delicious, and kind to your wallet. Every time I make these wraps, I think about how my grandmother would approve of this kind of practical creativity in the kitchen.
FAQ Section
Can I make these wraps ahead of time?
Absolutely! You can assemble the wraps up to 24 hours ahead and store them wrapped in the refrigerator. Just cook them when you’re ready to eat for the best crispy texture.
What if I don’t have rotisserie chicken?
Any cooked chicken works great – leftover grilled chicken, poached chicken breasts, or even canned chicken in a pinch. You can also quickly cook some chicken thighs for extra flavor and budget savings.
Can these be frozen?
Yes! Wrap the uncooked assembled wraps individually in plastic wrap and freeze for up to 3 months. Cook directly from frozen, adding 2-3 extra minutes to the cooking time.
How do I prevent the wraps from falling apart?
Make sure to roll them tightly and always cook seam-side down first. This helps seal the wrap. Also, don’t overfill them – less is more when it comes to keeping them intact!
For food safety when handling chicken, always follow CDC guidelines for safe food handling. According to the USDA, leftover cooked chicken should be used within 3-4 days when stored properly in the refrigerator.
If you’re looking for more ways to use rotisserie chicken, check out our chicken steak with white garlic sauce for another budget-friendly family favorite that transforms affordable ingredients into something special.
Related Recipe Recommendations
If you enjoyed this recipe, you might also like:
- Unbelievably Delicious Slow Cooker Cowboy Casserole (Budget-Friendly Comfort Food!)
- Easy Summer Lunch Ideas for Kids: Delicious, Budget-Friendly Meals They’ll Love
- 5-Minute Sloppy Joe Seasoning Mix That Saves You Money
Don’t forget to pin this recipe for later and share it with friends looking for budget-friendly family dinner ideas!